My Kia had a persistent oil leak for years, which I finally traced back to the crankshaft seal. While the seal itself is just a $5 part, accessing it is a major job. To reach the seal, I had to remove the accessory belts, water pump pulley, three-piece timing belt cover, timing belt rollers, timing belt tensioner, the timing belt, and the crankshaft pulley (or harmonic balancer). After that, the crankshaft sprocket that drives the timing belt needed to come off. It’s quite an involved process just to replace a small seal.
Before removing the timing belt, the camshaft and crankshaft must be positioned precisely at their alignment marks. Since the Kia has an interference engine, improper alignment could cause the valves to collide with the pistons, leading to serious engine damage.

Once all the accessories, timing belt rollers, and tensioners are removed, the timing belt can be slipped off the crankshaft sprocket. We have to make sure to preserve the alignment mark on the crankshaft sprocket, as it’s critical for proper timing during reassembly.

The crankshaft sprocket is secured with a Woodruff key, which I easily removed using locking pliers. After that, the sprocket should slide off the crankshaft. However, years of corrosion had fused it firmly in place. I made the mistake of trying to pry it off with a pry bar, which broke the back flange of the sprocket wheel. Heating it with a torch and soaking it in PB Blaster had no effect. Standard gear pullers didn’t work either, as there wasn’t enough clearance behind the sprocket to grip it properly.
I drilled and tapped two 6mm holes—breaking a drill bit and having to drill a third hole in the process—but ultimately didn’t need to use them. Instead, an armature bearing puller I ordered from Amazon did the trick. Its very thin lip slipped behind the sprocket, allowing me to pull it off cleanly.


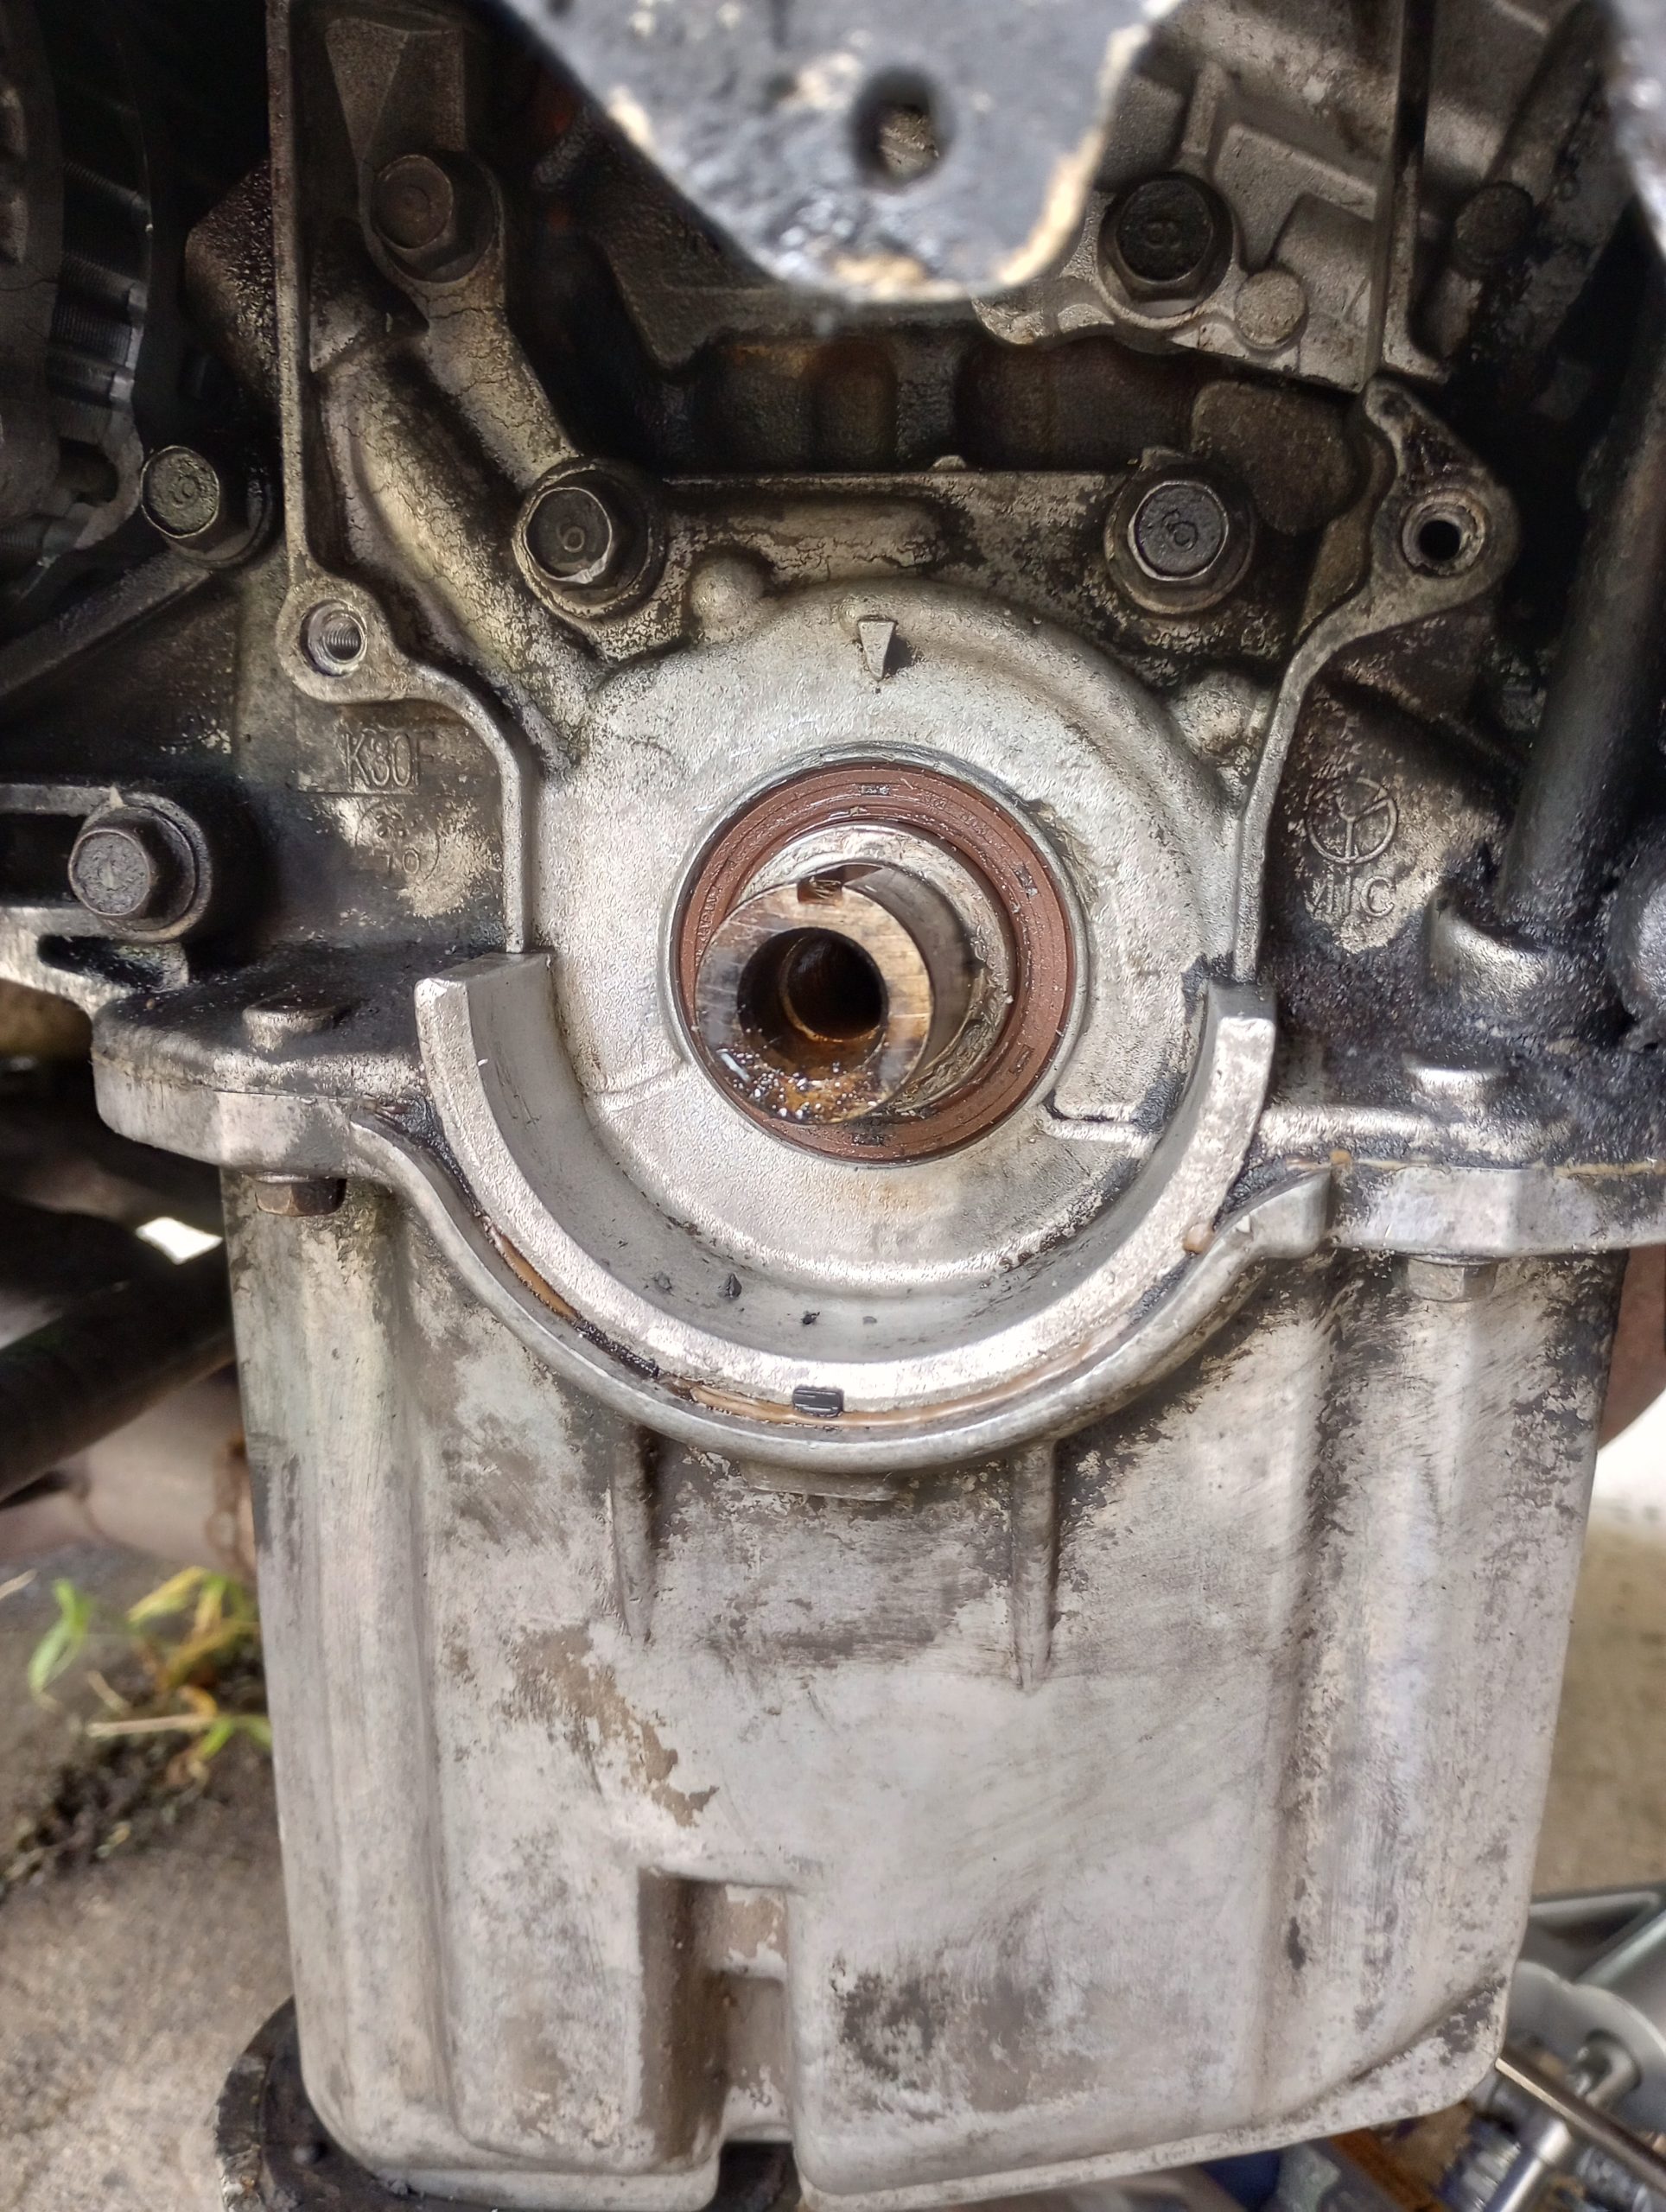
Removing the old seal requires careful handling to avoid damaging the surrounding surfaces. I was able to gently pry it out using a flat-edged screwdriver. Afterward, I thoroughly sprayed and cleaned the entire area to prepare for the new seal.

To ensure the new seal was installed evenly and parallel to the surface, I used a cut-down PVC pipe along with a bearing installer puck, gently tapping it into place with a soft mallet.

New seal is installed.
Since the old sprocket was damaged beyond repair, I needed to buy a new one. However, none of the usual sources like RockAuto stocked it. When I contacted the Kia parts dealer, they told me the sprocket wasn’t available anywhere in the entire country. Fortunately, I managed to find one on eBay.

Installing the timing belt requires careful attention since the belt is under significant tension and precise alignment is crucial. A helpful technique is to use zip ties to secure the belt to the cam sprockets at their correct positions. This keeps the belt in place while allowing the camshafts to rotate freely. Next, secure one of the cam sprockets to the engine frame to prevent it from moving. With that held steady, we can rotate the other cam sprocket using a wrench to apply tension to the belt and install the tensioning rollers.

Since I was already this far into the job, it would be a shame not to replace all the accessory belts with new ones as well. Before starting the engine, rotate the crankshaft by hand for a few revolutions to ensure the camshafts move smoothly and that the valves and pistons aren’t interfering. After reassembly, everything came back to life, and the engine oil leak was completely resolved.
Leave a Reply